Many people have old Sawzall blades sitting around their garage or shop but don’t know what to do with them. The good news is that you can turn your Sawzall blade into an impressive carving knife.
Although this idea isn’t anything new, it definitely deserves more attention since it’s such an easy and cheap way to make yourself a new tool.
In the following article, we will show you how to turn a Sawzall blade into a carving knife and explain the advantages of doing so, so read on if you want to learn more.
Table of Contents
ToggleBefore you start
First, we’ll need to gather up all of our supplies. You can find some of these materials in your garage or home workshop if you have access to them. The other stuff is relatively inexpensive and may be able to be purchased at local hardware stores or retail stores like Home Depot.
Finally, I’ll let you know which tools I used, but by no means do you need all of them for every project. For example, I only use my table saw for projects that require miters and don’t require curves because my miter saw does just as good of a job as my table saw.
Having multiple tools is awesome, but having enough time and money is even better. All right, let’s get started
What you needed
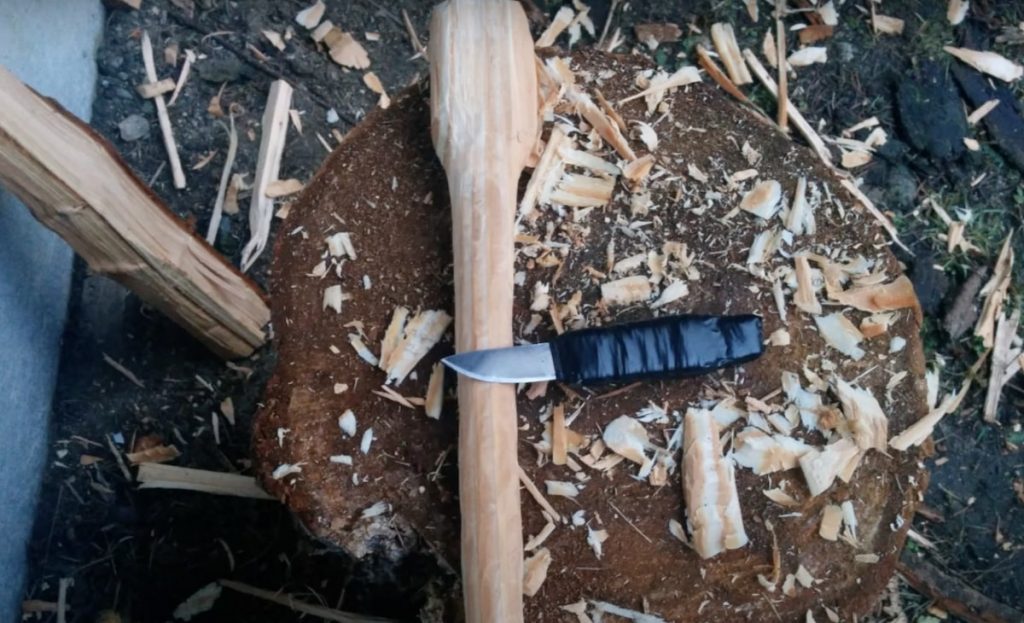
To start, you’ll need an old Sawzall or jigsaw blade. You might want to make sure it’s not too rusty-if it is, cleans it off before you get started. But don’t worry if it is a little rusted; that just adds character.
Next, make sure you have plenty of wood and tools: wood glue, sandpaper (or rough file), and a rasp. Last but not least-and arguably most important-you need clamps and something hard (like granite or marble) for them to hold onto.
We recommend safety glasses for protecting your eyes from loose metal shards as well. And finally, you’ll want gloves so your hands don’t get covered in tiny pieces of metal during the sanding stages.
Clean the metal
Sawzall blades have a lot of interesting shapes, sharp corners, and jagged edges that need to be removed before you can make a good cutting edge. The first step is to clean out all of these excess metal pieces from your blade.
I used an angle grinder with a wire wheel attachment. These tools are nice because they clean up quickly (less than 5 minutes) and leave no mess behind on your piece.
If you don’t have access to one of these grinders, you can use sandpaper, but it will take significantly longer – maybe even 30 minutes per side if you have 3 sides to sand down (this is just my guess).
Grind off the teeth on one sidesidesideside
The teeth on reciprocating saw blades are very sharp, which is why you need to take care when handling them. As one of our testers discovered, simply brushing against your skin with a fully intact reciprocating saw blade can cause minor cuts and scrapes.
To avoid any unwanted injuries, keep all reciprocating saw blades away from human skin. Removing one side of the teeth will prevent you from accidentally nicking yourself while carving or whittling wood.
Make it thicker
When you’re finished with your bone, wooden handle, and patterned-steel skin, take it out back and heat it up in an acetylene torch until it’s red-hot. Quench it quickly in oil-the quenching will harden and temper your blade, making it super durable.
Finally, polish and sharpen your new knife using a sanding block on some rough sandpaper. Voilà. A one-of-kind handcrafted new tool for your next whittling session.
Check your handle fit
Your handle doesn’t need to be carved in one continuous piece. Many carvers purchase their handles from stores and then fit them into individual blades, so you might want to try several different types before settling on one type.
Simply loosen or tighten screws along with your handle until it fits comfortably in your hand and allows for ample room for your fingers.
Test out different models at home by holding them at different angles; you’ll quickly get a feel for which types of handles are easiest on your hands and how they feel when working with different blade shapes.
Finish with sandpaper
Using coarse-grit sandpaper, it will be very easy for you to sharpen your edges and make them smoother. Try making sure that you apply pressure evenly across your knife as you move from one side of it to another.
You can also use honing oil or water while working on your product. If you want, you can even try using diamond sharpening blocks in order to ensure that there are no flaws in your blade.
If everything goes according to plan, it should only take around 30 minutes or so before you have an awesome new crafting tool. Good luck.
Adding a sheath
The first step is to heat up some leather. I did mine by setting it on fire in my forge, but you can also use an acetylene torch or just make one out of something flammable. Once it’s smoldering hot, shape it over your blade and let it burn.
Once cool, you should have a sheath that can hold an edge; if not, put some more leather on top and repeat until you do.
While you’re at it, consider adding a loop so that you can tie off your sheath with string or paracord when carrying. You don’t want that thing slipping off while in use.
Advantages
First, let’s cover some of the major advantages of using a large circular saw for your next project. First and foremost, you’ll probably end up spending less time doing research on products than if you were to start from scratch.
If you already have a circular saw then there’s no need to spend countless hours comparing every single piece of equipment that might work for your current or future project.
Second, these tools are usually quite powerful and can cut through wood quite quickly while reducing wear and tear on your body. You may be able to complete projects more quickly because of its overall efficiency as well.
Last but not least, many of these tools are fairly inexpensive and easy to find at most hardware stores around town. This means that it will be much easier for you to replace it if something does happen to go wrong with it down the road.
It also means that you won’t have to worry about making too many sacrifices when it comes down to what kind of tool you choose.
Conclusions
It is cheaper, takes less time, and is generally a better option than purchasing an expensive carving knife. You can make one of these knives out of any standard reciprocating saw blade. You will be surprised by how well it works. If you want to learn how to cut PVC with a Sawzall.
Let me know if you make one or try it out…I would love to hear your thoughts. Good luck and happy cutting 🙂
